How to: Use Signal on iOS
Last Reviewed: February 16, 2021
We've updated this guide to a new page. Please see the new version here.
Signal is a free and open source software application for Android, iOS, and Desktop that employs end-to-end encryption to keep communications safe. Communications can be made between either individuals or a group, allowing users to send end-to-end encrypted text, picture, and audo & video messages, as well as engage in live video and audio calls. All users must have the Signal app installed to communicate with each other. Encrypted calls and messages use your data connection; therefore both parties to the conversation must have Internet access on their mobile devices. Due to this, Signal users don't incur SMS and MMS fees.

Download Location: The app can be downloaded from the Apple App Store
System requirements: iOS 11.0 or later. Compatible with iPhone, iPad, and iPod touch.
Version used in this guide: Signal iOS 5.4
License: GPLv3
Other reading:
Level: Beginner-Intermediate
Time required: 15-20 minutes
Installing Signal - Private Messenger on your iPhone
Step 1: Download and Install Signal Private Messenger
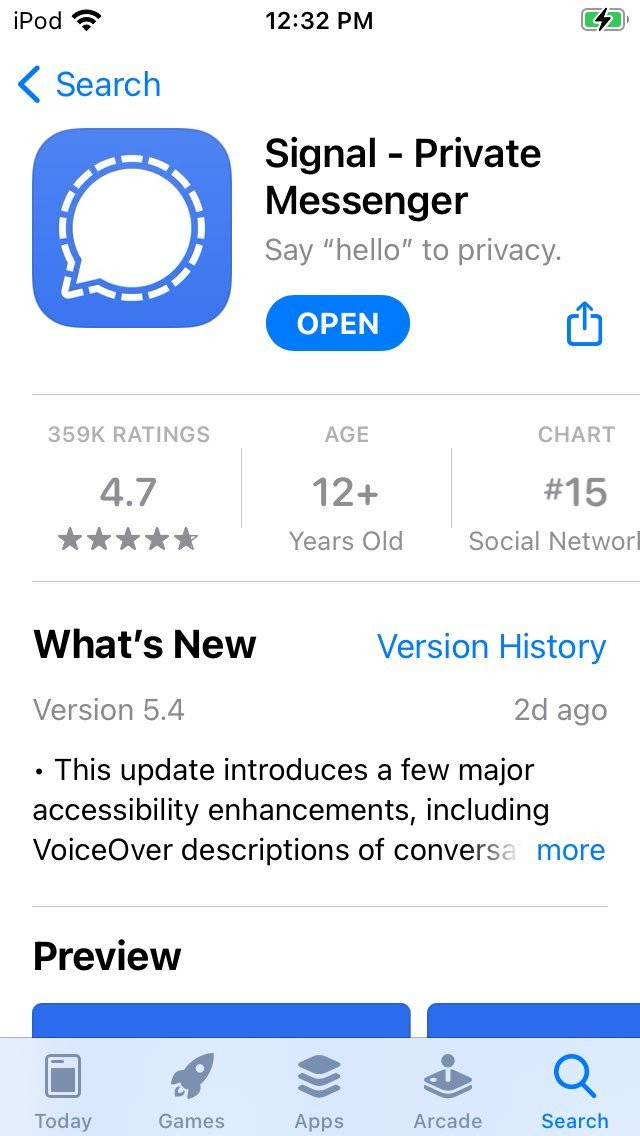
On your iOS device, enter the App Store and search for “Signal.” Select the app Signal - Private Messenger.

Screen displaying the cloud with the down arrow
Tap the cloud with the down arrow to download and install the app.
App Store with “OPEN” text for Signal
Once it is downloaded, tap “OPEN” to launch the app.
Step 2: Grant or Deny Permissions
After an introductory screen, you will see a screen asking for you to grant permissions to Signal on your phone.
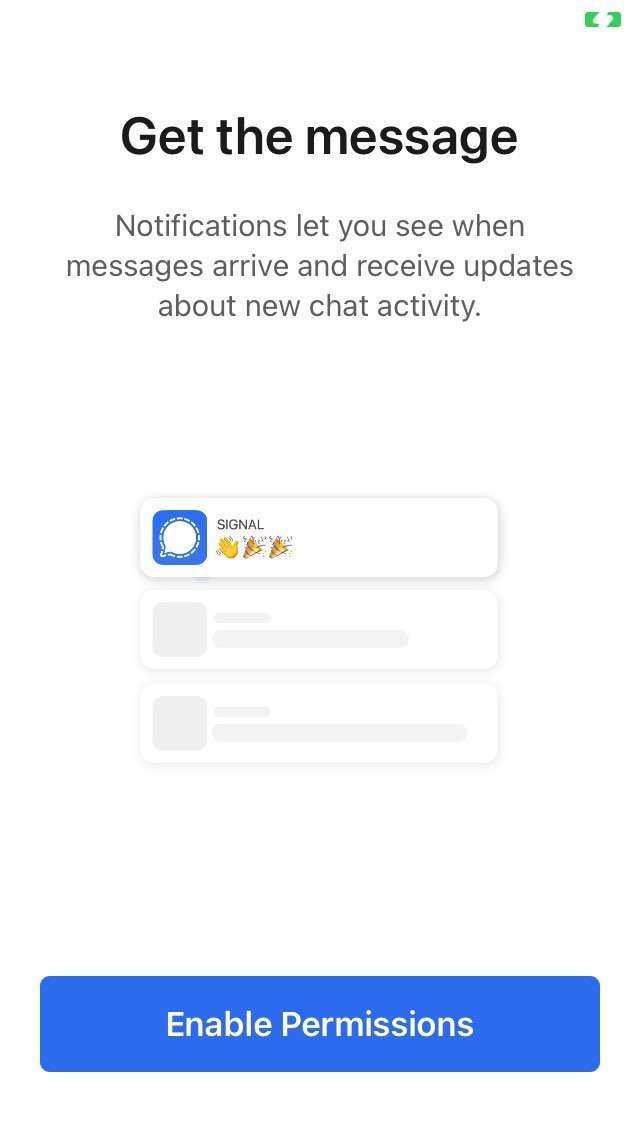
The “Ask Permissions” screen
After tapping “Enable Permissions,” your iPhone will prompt you to share your contact list with the Signal app. This will allow you to more easily discover which of your contacts you can communicate with over Signal. If you don’t allow this permission, you can still use Signal, but you will have to manually enter your contact’s phone number to begin chatting with them.
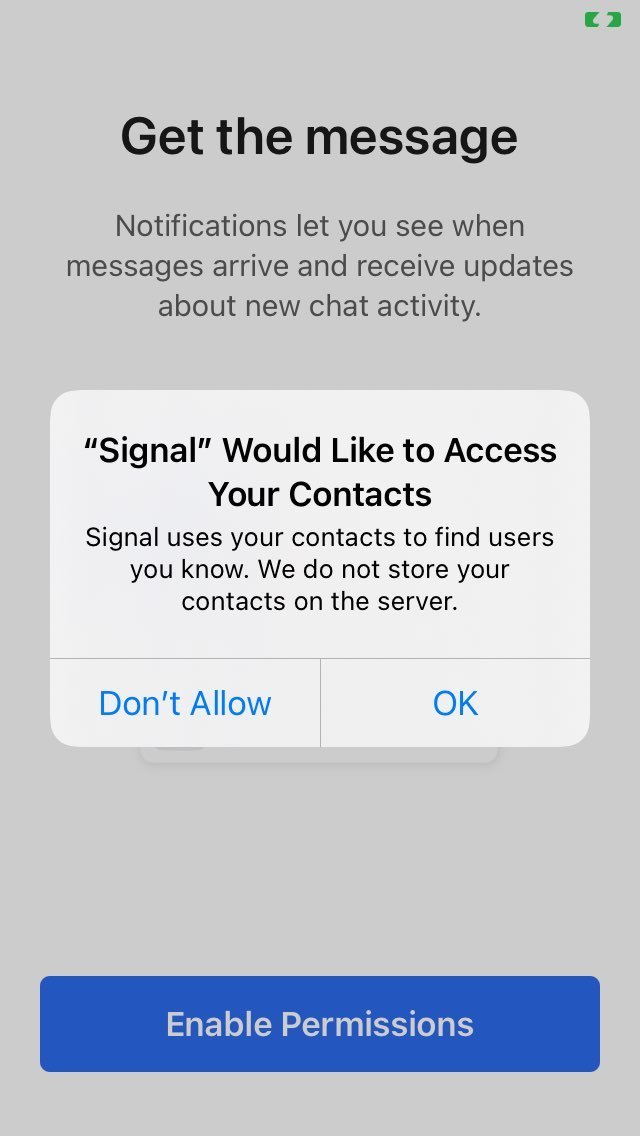
Contacts permission dialogue
You will also be prompted to receive notifications from Signal. This will let you know when you receive new messages. If you don’t allow this permission, you can still manually check Signal for new messages, but you won’t be notified automatically when new messages arrive.

Notifications permission dialogue
Step 3: Register and Verify your Phone Number
You will now see the following screen. Enter your mobile phone number and tap “Next.”

Screen to enter your number
In order to verify your phone number, you will be sent an SMS text with a six-digit code. You will now be prompted to enter that code.

Screen to enter verification code
Step 4: Choose a Profile Name and Image
The profile image and name you choose will be shown to any contacts you have saved in your address book, when you initiate or accept new chats, and when you join new groups. A first name (either genuine or made up) is required, the image and last name are optional. Enter your information in this step and tap “Save.”

Profile screen before information is entered

Profile screen after information is entered
Step 5: Choose a PIN or Passphrase
A PIN keeps your information safe on Signal’s servers, and if you switch phones you will be able to recover your settings, profile, and contacts using it. Choose a secure PIN or Passphrase and then tap “Next.”
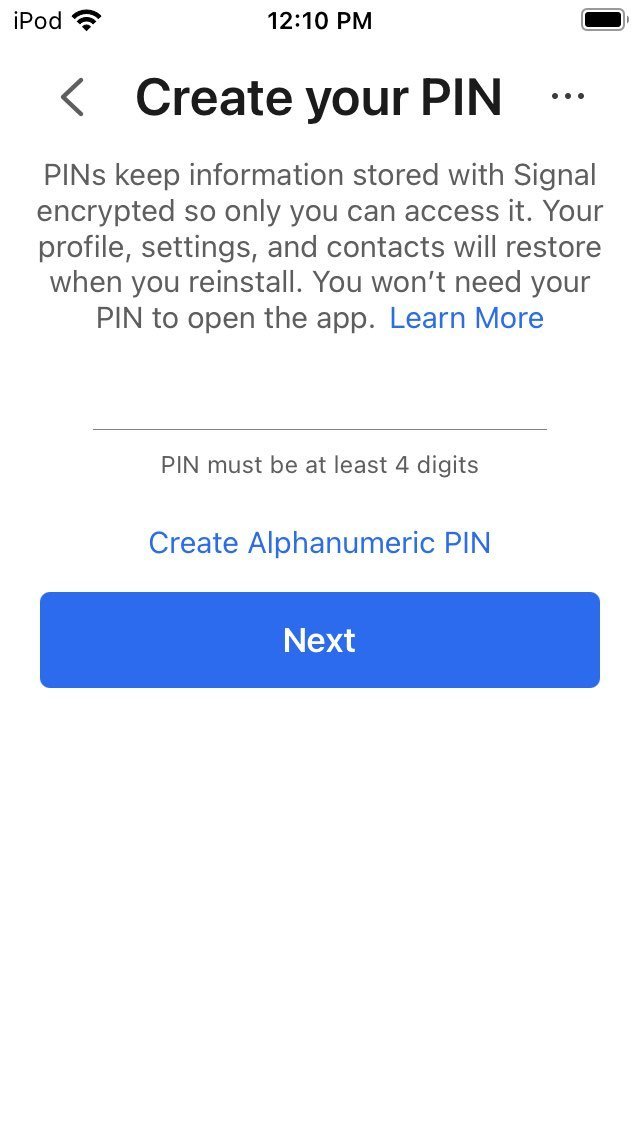
“Choose pin” screen
Using Signal
In order to use Signal, the person that you are contacting must have Signal installed. If you try to call or send a message to someone using Signal and they do not have the Signal app installed, the app will ask if you would like to invite them via SMS, but it will not allow you to complete your call or send a message to them from inside the app.
Warning: Signal provides you with a list of other Signal users in your contacts. To do this, data representing the phone numbers in your contact list is uploaded to the Signal servers, although this data is deleted almost immediately. This may be an issue for those with particularly sensitive threat models. If sharing your contacts with Signal is a concern, you can deny the contacts permission during setup as described above.
Communicating with a Contact
How to Send an Encrypted Message
Warning: Note that the Signal Foundation, the makers of Signal, use other companies’ infrastructure to send its users alerts that they’ve received a new message. They use Google on Android and Apple on iPhone. That means information about who is receiving messages and when they were received may leak to these companies.
To get started, tap the pen icon in the upper-right corner of the screen.

The pen icon circled
You will see a list of all the registered Signal users in your contacts.

Registered Signal users to choose from
When you tap a contact, you’ll be brought to the conversation screen for your contact. From this screen, you can send end-to-end encrypted text, picture, stickers, audio, or video messages.
How to Initiate an Encrypted Call
To initiate an encrypted video call to a contact, select that contact and then tap on the camera icon (1). For voice calls, tap on the phone icon (2).

A conversation with the camera icon labeled “1” and the phone icon labelled “2”
At this point, Signal may ask for permission to access the microphone. Tap “OK.”
Once a call is established, your call is encrypted.

A one-to-one video call
Communicating with a Group
How to Start an Encrypted Group Chat
You can send an encrypted group message by tapping the pen icon in the upper-right corner of the screen, and then selecting “New Group.”

The pen icon circled
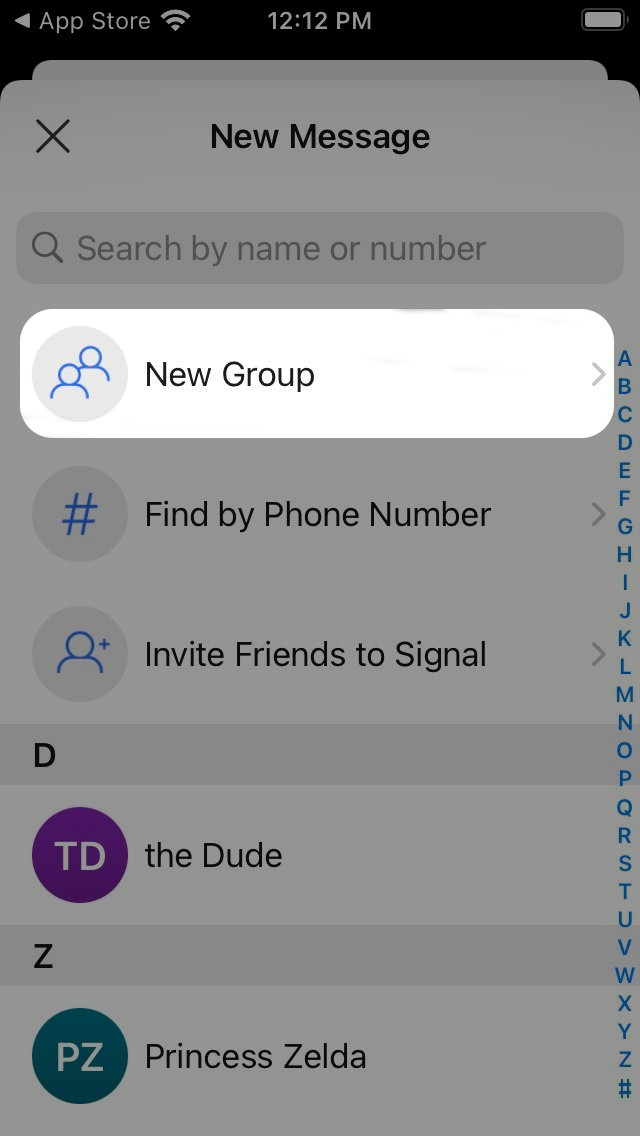
“New Group” circled
On the following screen, you’ll be able to name the group and add participants to it. After adding participants, you can tap “Next” in the upper right corner of the screen.

Selecting participants in group chat
This will initiate the group chat.

A group chat
At this point, anyone can add members to the group. If you wish to change this, or the group name, icon, or add or remove participants, this can be done from the group chat screen by tapping the name of the group.
Sharing a Link for Anyone to Join Your Group
Signal allows you to create a link for a group and share that link so anyone can join without having to be added manually.
To enable the “group link”, open the screen where you are able to message your group. From this screen, tap the name of the group at the top of the screen, then scroll down and tap on “Group Link.”
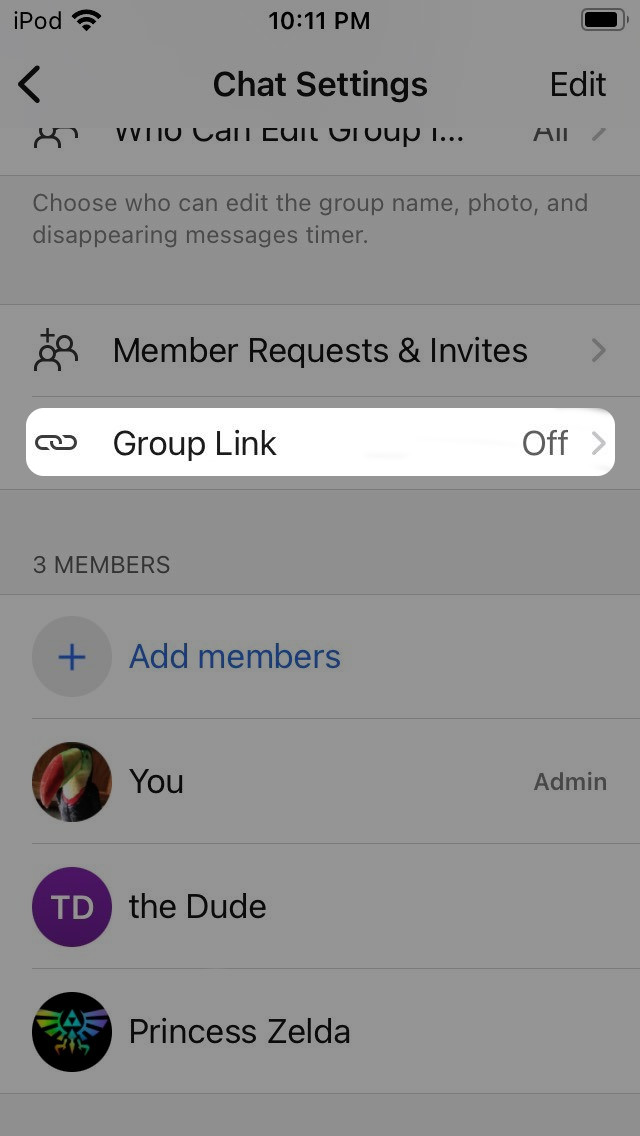
Group chat settings with “group link” circled
A screen will appear allowing you to enable the group link, and also choose whether new members must be manually approved by a group administrator. In this example, we enable both of these.
Once enabled, you can share the group link with others by tapping “Share.”

Group link setting with both sliders enabled
If you’ve enabled “Approve New Members,” any time a member tries to join the group you will receive a notification as seen below.

Group chat with pending member request
From here, you can tap “View Requests” to be brought to the “Member Requests & Invites” screen. You can also navigate to this screen from the group settings screen.

Member Requests and Invites screen
Tap the check mark to approve a request, or the “x” to deny it.
Restricting and Administering Groups
When first created, anyone can add new members to a group or change group settings. Groups can be restricted so that only group administrators have these permissions.
To restrict a group, open the screen where you are able to message your group. From this screen, tap the name of the group at the top of the screen, then scroll down. You will see the group settings under “Who Can Add Members” and “Who Can Edit Group Info.” Tap on these to change the settings.

Group chat settings with restriction options circled
When a group is first created, the only administrator is the group creator. Signal allows the group creator to delegate administrator permissions to members of the group.
To make a member an administrator, tap on the group name at the top of the screen. Then, scroll all the way down to group members. Tap on a member.

Group chat settings with a member circled
You will see the option to make that member an administrator of the group.
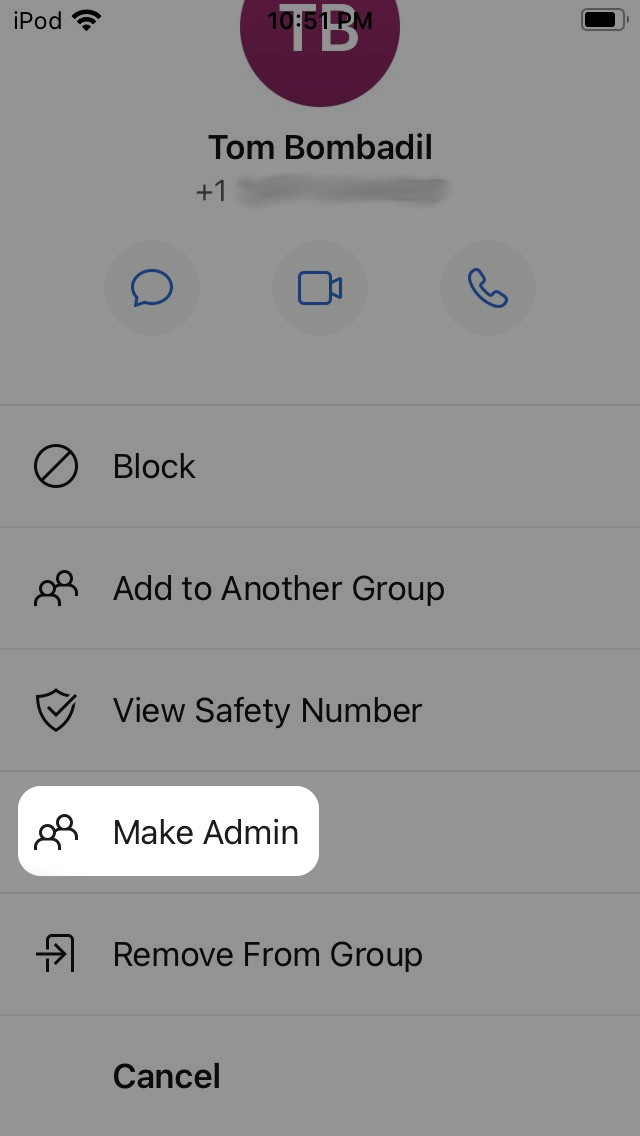
Group chat settings after a member is selected, with “Make Admin” circled
How to Initiate a Group Encrypted Call
To initiate an encrypted video call to an entire group, select that group and then tap on the camera icon.

A group with the camera icon circled
At this point, Signal may ask for permission to access the microphone. Tap “OK.”
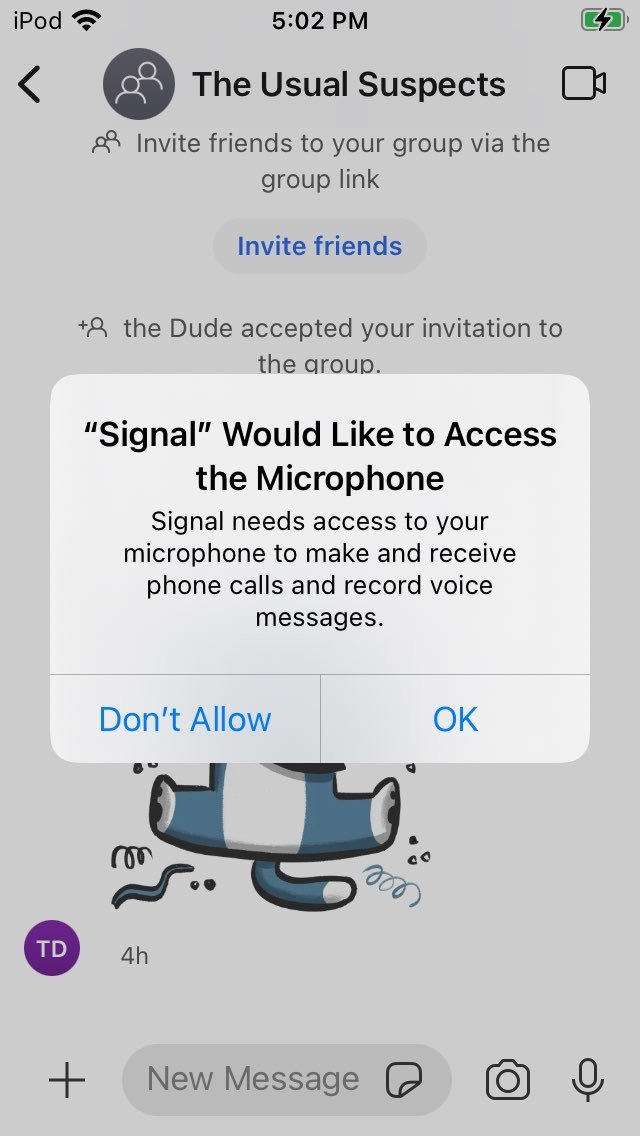
Microphone permission dialogue
You will then see a screen with the ability to swap which camera you are using, turn off video, or mute your microphone before initiating the call. Tap “Start Call.”
Group call preparation screen
At this point, your call will start. When participants join your call, they will display on your screen.

Group call screen
Mute Conversations
Sometimes conversations can be distracting. One feature that is especially useful for group chats is muting notifications so you don’t see a new notification every time a new message is written. This can be done from the group chat screen by tapping the group name and selecting “Mute.” You can then select how long you’d like the mute to be active for. This can be applied to individual conversations as well, if desired.
How to Verify your Contacts
At this point, you can verify the authenticity of the person you are talking with. This is to ensure that their encryption key wasn’t tampered with or replaced with the key of someone else—a process called key verification . Key tampering is a potential risk when downloading an application over an insecure network. Verifying is a process that takes place when you are physically in the presence of the person you are talking with.
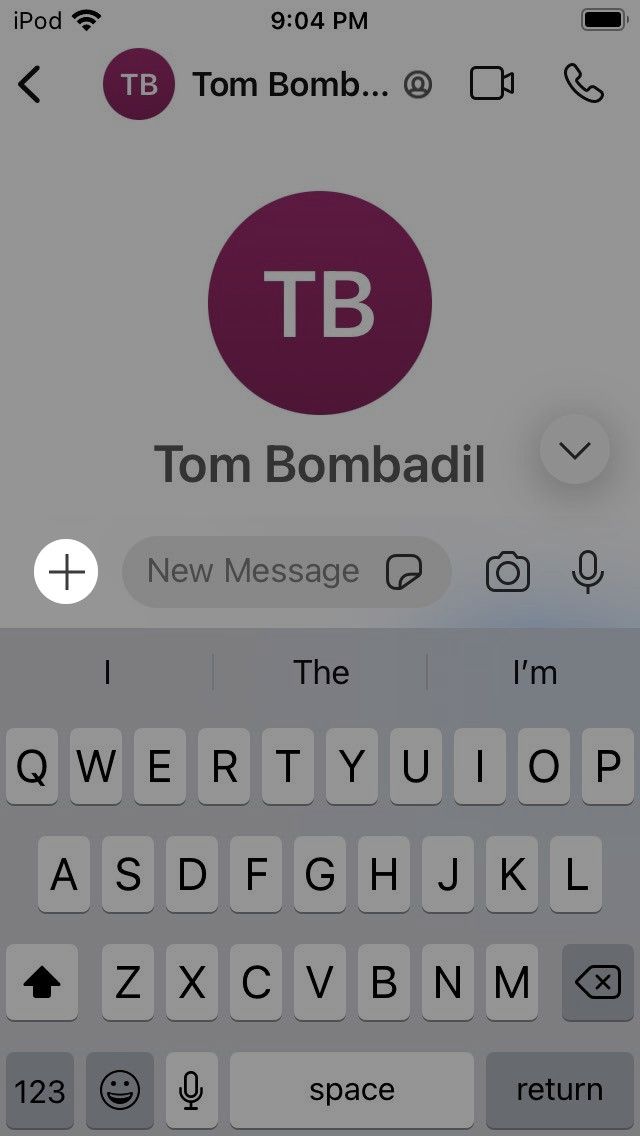
First, open the screen where you are able to message your contact, as described above. From this screen, tap the name of your contact at the top of the screen.

Conversation with contact name circled
From the following screen, tap “View Safety Number.”

Contact info with “View Safety Number” circled
You will now be brought to a screen which displays a QR code and a ‘safety number.’ This code will be unique for every different contact you are conversing with. Have your contact navigate to the corresponding screen for their conversation with you, so that they have a QR code displayed on their screen as well.

QR code of contact
Back on your device, tap the QR code to scan. At this point, Signal may ask for permission to access the camera. Tap “OK.”
Now you will be able to use the camera to scan the QR code that is displayed on your contact’s screen. Align your camera to the QR code:

Verify contact screen scanning other phone
Hopefully, your camera will scan the QR code and show a “Safety Number Matches!” dialogue, like this:
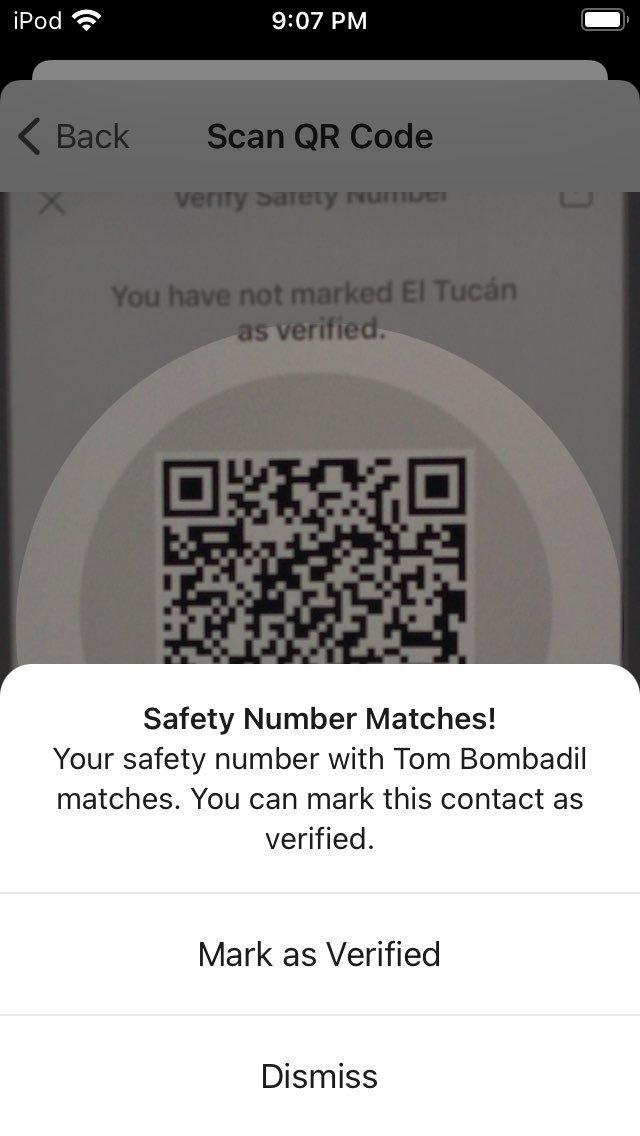
Safety number matches
This indicates that you have verified your contact successfully. You should now tap “Mark as Verified” to have the app remember that your contact has been verified. If instead your screen looks like this, something has gone wrong:

Failed to verify safety number
You may want to avoid discussing sensitive topics until you have verified keys with that person.
Note for power users: The screen displaying your QR code also has an icon to share your safety number in the top-right corner. In-person verification is the preferred method, but you may have already authenticated your contact using another secure application. Since you’ve already verified your contact, you can safely use the trust established in that application to verify numbers within Signal, without having to be physically in the presence of your contact. In this case you can share your safety number with that application by tapping the “share” icon and sending your contact your safety number.
Disappearing Messages
Signal has a feature called “disappearing messages” which ensures that messages will be removed from your device and the device of your contact(s) in a chat some chosen amount of time after the messages are seen.
Warning: You do not have control over the person with whom you are chatting—she could be logging or taking screenshots of your conversation, even if you’ve enabled “disappearing messages.”
To enable “disappearing messages” for a conversation, open the screen where you are able to message your contact or group. From this screen, tap the name of the contact or group at the top of the screen, then tap the slider next to “Disappearing Messages.”

Group chat settings with “disappearing messages” circled
A slider will appear that allows you to choose how quickly messages will disappear:

Group chat settings with disappearing messages enabled
After selecting this option, you can tap the “<” icon on the top-left corner of the screen, and you should see information in the conversation indicating that “disappearing messages” have been enabled.

Group chat with notification that disappearing messages is enabled
You can now send messages with the assurance that they will be removed after the chosen amount of time.
Sending Files or Photos
Signal also enables you to share files and photos with your contacts. From the conversation screen, tap the “+” icon in the bottom-left corner of the screen.
Conversation with “+” circled
At this point, Signal may ask for permission to your photos. You can choose “Select Photos…” or “Allow Access to All Photos.”

Photos permissions screen
The bottom of the screen will now display a marquee of photos which you can select to share. Below that, you can also choose to share a file, contact, or your location.
